Digitizing your project workflow in Proggio allows your organization to manage your projects from start to finish in one solution and keep all of your project’s data stored in one place for future reference.
To learn about how your organization can benefit from project workflows, click here.

How to Setup Your Customizable Project Workflow in Proggio
Setting up your customized project workflow in 4 steps:
Step 1: Define your project workflow stages.
Project workflow stages vary significantly between organizations, so we made sure that you can customize them to fit your needs.
The first step is to define the project workflow stages based on the organization’s requirements.
From the Navigation panel > Settings > Project Workflow

Stage titles, the number of stages, and the stage-assigned color can be edited as needed. While all of the project workflow stages are fully customizable, the “Archived” step is always required in the end to ensure clarity on its completion and to store it properly for future reference. You can also reorganize the order of the workflow once it is put together by dragging and dropping the workflow stage to the new position.
Step 2: Defining requirements and protocols to move projects through a stage.
Now that the stages of the workflow have been defined and standardized across the organization, it is time to define the actions required to move them between stages. Proggio allows defining several action types when moving between stages. So when someone tries to move a project from one stage to the next, you can trigger a digitized form that includes the following options to be completed:
- Document: If such action is defined, a specific document is required to be attached to the workflow in order to move to the next stage (i.e., product requirements, project team structure, test cases, and more).
- Selection box: If such action is defined, the user needs to select a value from a predefined list in order to move to the next step (i.e., select the leading department for a specific project).
- Task: If such action is defined, there is a task required to be completed before moving to the next step (i.e., open a specific item number in an ERP system). Note: This action type is generic, and designed to capture all kinds of actions relevant to your organization that are not a document, a predefined selection, or approval.
- Free text: If such action is defined, the user may add any additional information that is requested (i.e., notes, comments, etc.).
- Prioritization business drivers: If such action is defined, the user would need to select which prioritization category it falls under by the organization’s definition (i.e., cost savings, compliance, yield, etc.).
- Project metadata: If such action is defined, the user will be prompted to add the requested project metadata (i.e., city, country, product item, etc.).

Action categories can be used multiple times within the same stage (for example, several approvers for the same workflow stage). You can also make specific workflow categories mandatory for submittal.
Once fully defined, the project workflow is ready to be used with any project.
Step 3: Gain a high-level view of a project’s workflow status.
Proggio uses the stages in the project workflow in multiple ways to make sure projects are managed and promoted correctly throughout their workflow. The project workflow’s progress is presented at the project level on the ProjectMap™, and it is the best way to ensure its progress and link it correctly to other project elements.
The project workflow stage is also presented and used in the Portfolio Board view, where the organization can review, edit, and manage the overall project stages and workflow status.
From the Navigation panel, select the Portfolio icon > Select Board.

From this view, you can learn more about a project’s details, duplicate it, export it, archive it, edit its settings, or delete it. For example, you can select to view the details of a project on the ProjectMap™ timeline (where the details of the workflow are managed) or to show a task list (where multiple workflow actions can be tracked per assignee and status).
From any of the Project tiles > Right-click > Select option.

Step 4: Trigger a workflow management protocol when a project moves from one stage to the next.
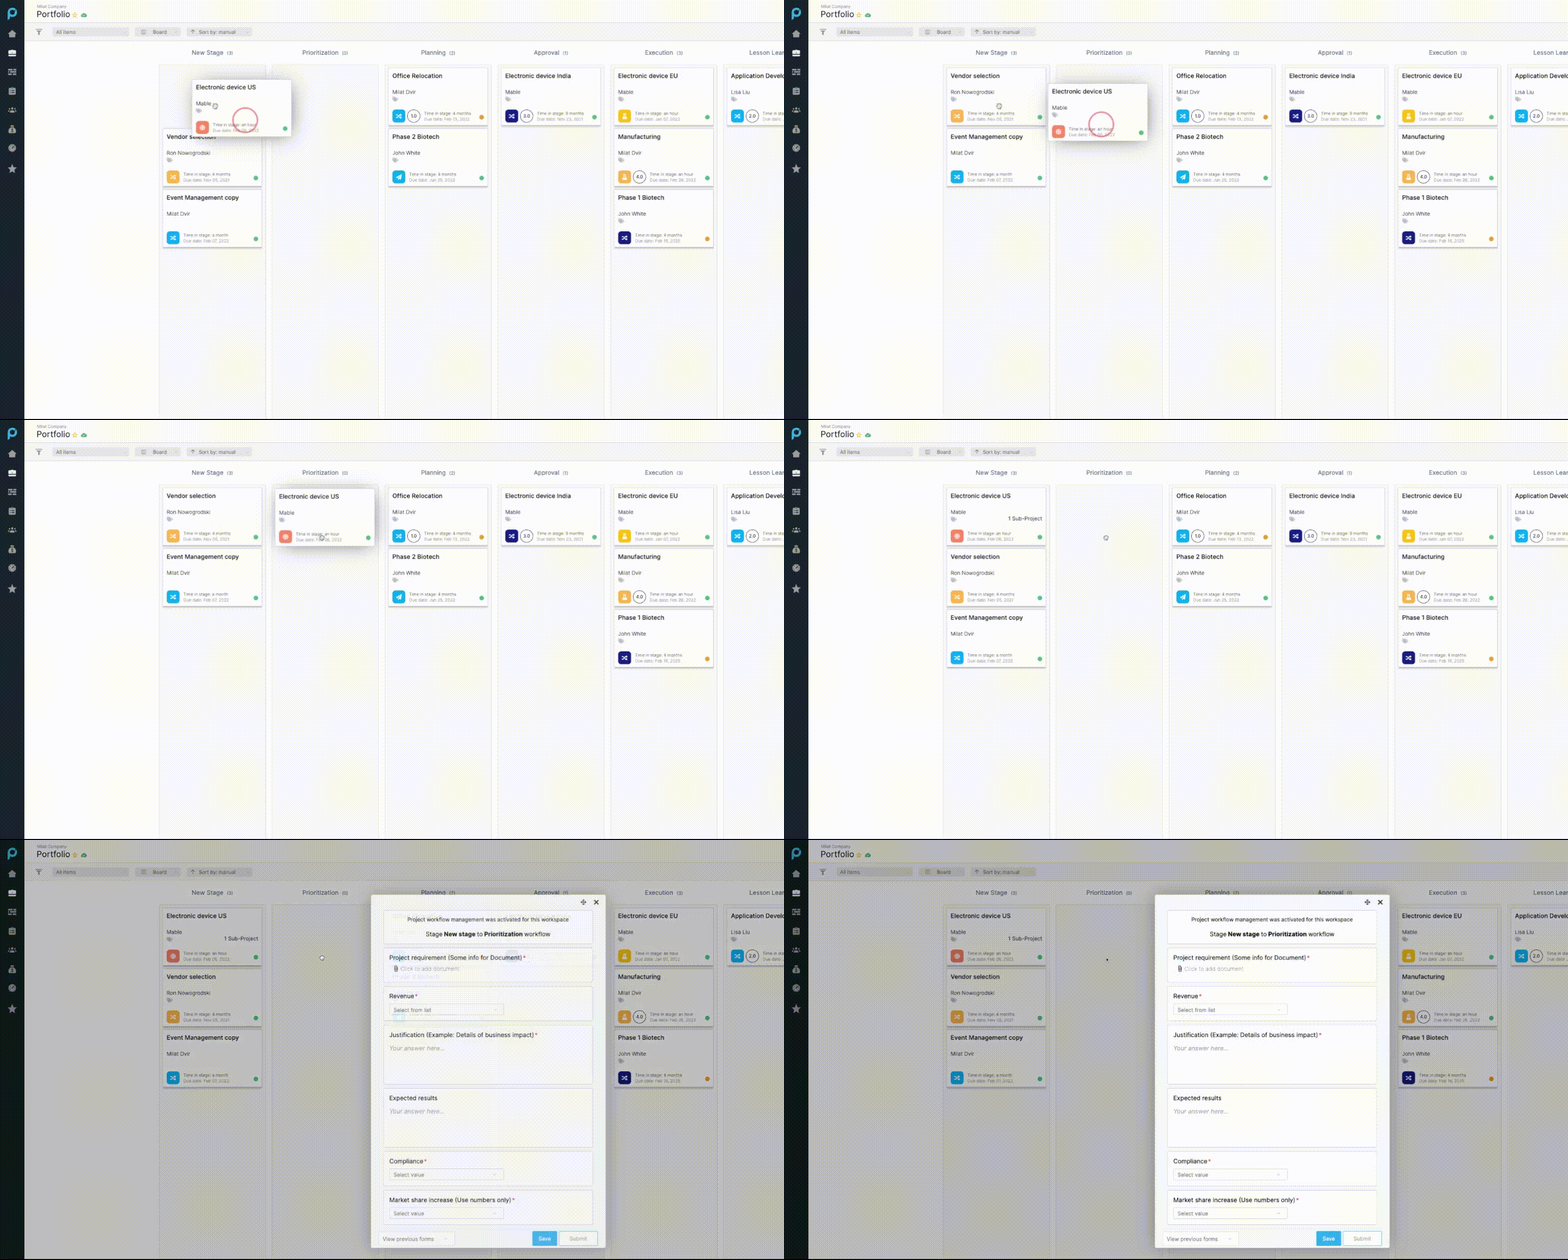
After all requirements and protocols have been defined and assigned to the relevant stages, you can now enforce protocols. Whenever a project is transferred from one stage to the other, the appropriate form will pop up and encourage the user to fill it in with all the items defined in step #2.
From the Navigation panel > Portfolio icon > Select Board > Drag and drop a project to the next stage > Protocol form will pop up automatically.

A user can define how strict the enforcement is, some fields are mandatory and some are not. A user can also, if needed, block the progress of a project from one stage to the next if all relevant items are not filled.
Want to learn more?